I purchased the GBS Plenum, it replaces the stock intake manifold and its a great piece of kit. It also seems like a have version 2.0 - the addition of a hose connector. This one baffled me for a while but it looks like I have two options.
Option 1 - bung the hole and adjust the throttle screw to get the idle correct. This is what I had originally intended on doing, admittedly because I didn't understand what an IACV was.
Option 2 - connect up a remote IACV. Now that I know what it does (and that GBS sell a mounting bracket) I am going to chose this option. The Emerald ECU has instructions on how to setup the IACV when its required and I am looking forward to that challenge; if I can't do it I will be able to find someone who can.
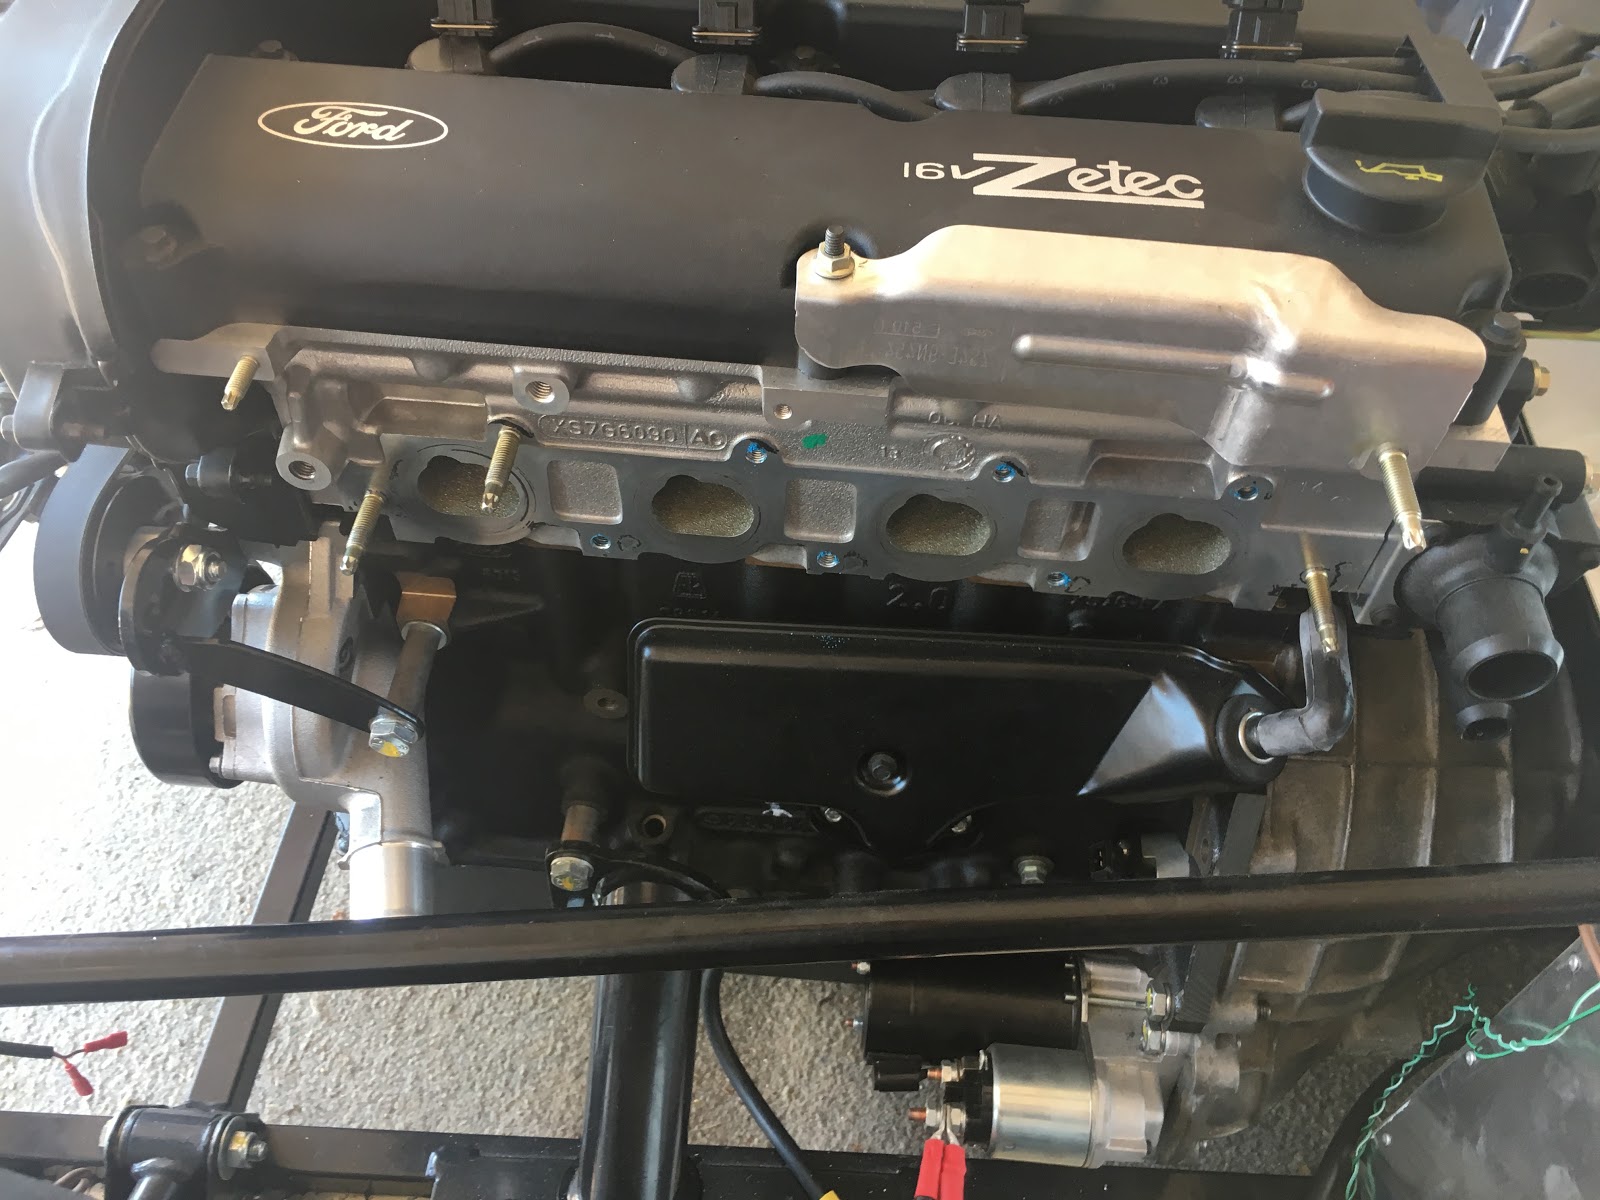
The Plenum is very well made and comes powder coated. The original manifold needs to be cut down and this is a service that GBS do and I would recommend it as it needs to be done correctly:
There is also a threaded hole which accepts the air temperature sensor - top tip from me (common sense now...) clean the thread out *before* fitting the Plenum to the car!
I wasted around an hour of absolute faffing around trying to fit the sensor and it was impossible whilst on the car. I actually ended up cleaning the thread out after checking the sensor size and thread pitch on the emerald site (M12 1.5 BTW):
Once the thread was cleaned up the sensor went in fine, throttle body attached to the car and we are done:
The fuel rail will be sorted later on, its simply resting to seal the holes up. Looking very much like an engine now:
Tuesday, 10 July 2018
Alternator
I enjoyed this one. I had already been given an alternator for free when I purchased my flywheel, unfortunately the brackets didn't fit so I thought I would save the time and effort required and went for the GBS kit. Everything required to fit the alternator is in the kit:
The brackets are all power coated and its obvious they are very good quality - one of the good things I like about the GBS supplied parts. The bad thing is they came with no instructions only a note saying download them off the kitspares site; the problem with that is they are a set of pictures. From what I could see the pictures were also of two different types of alternator and brackets (I think!).
It felt a little bit like when you buy Ikea furniture, at first it makes no sense at all but when you are half way though it all comes together. Anyway if you do buy the kit you will have no problems fitting it and working out how it fits together, for me it was a nice and easy couple of hours work:
You can see I removed one of the metal "bolts" in the block, both need to be removed and are not required.
The tensioner pulley is attached as per the picture. I had to take it off at first go as I mounted it in the hole above the manifold (I wasn't paying attention...). It also connects to the front of the block and is very sturdy:
Next we have to remove the lifting eye and fit the bracket which is attached to the rear of the alternator top hole:
There are a number of washers required to make sure the alternator is square, I used a piece of wood at the front to check.
The bottom bracket connects to the engine block and again a few washers are required to pad out the bottom bolt. Time to fit the belt:
The tension looks OK but I need to check how to tension it up correctly - I guess I will find out later on!
The brackets are all power coated and its obvious they are very good quality - one of the good things I like about the GBS supplied parts. The bad thing is they came with no instructions only a note saying download them off the kitspares site; the problem with that is they are a set of pictures. From what I could see the pictures were also of two different types of alternator and brackets (I think!).
It felt a little bit like when you buy Ikea furniture, at first it makes no sense at all but when you are half way though it all comes together. Anyway if you do buy the kit you will have no problems fitting it and working out how it fits together, for me it was a nice and easy couple of hours work:
You can see I removed one of the metal "bolts" in the block, both need to be removed and are not required.
The tensioner pulley is attached as per the picture. I had to take it off at first go as I mounted it in the hole above the manifold (I wasn't paying attention...). It also connects to the front of the block and is very sturdy:
Next we have to remove the lifting eye and fit the bracket which is attached to the rear of the alternator top hole:
There are a number of washers required to make sure the alternator is square, I used a piece of wood at the front to check.
The bottom bracket connects to the engine block and again a few washers are required to pad out the bottom bolt. Time to fit the belt:
And complete:
The tension looks OK but I need to check how to tension it up correctly - I guess I will find out later on!
Cooling System
Over a year has gone by - I have been busy, unfortunately the car has had to take a back seat but here I am, back on it and jumping straight back in at the deep end.
So, onto the Cooling System! I placed an order with GBS last week and purchased everything necessary for to complete the cooling side of the engine. The kit is really good quality and comes with everything you need, there aren't any instructions but its fairly self explanatory - previous blog posts helped.
The kit as it came:
You will notice the mounting bracket that connects to the steering column mounts, the tube is pretty solid in place but I guess after a while and with a lot of heat cycles the hoses will get softer and maybe sag. Its a GBS part and easy to fit, the pipe itself is attached to the bracket via cable tie.
So, onto the Cooling System! I placed an order with GBS last week and purchased everything necessary for to complete the cooling side of the engine. The kit is really good quality and comes with everything you need, there aren't any instructions but its fairly self explanatory - previous blog posts helped.
The kit as it came:
The water rail kit gives you all you need to setup the rail only, you do need to purchase the additional pipes to route from the water pump and the rail to the radiator. I forgot to photo the contents of the kit however you will see it later on as I progressed.
First step was to remove the stock Exhaust Manifold, then the oil flame trap - there's a bit of discussion as to whether this is required - however the norm is to remove and block it off, which I have decided to do with the ATR blanking plate from GBS:
Much better and more room. Next was removing the stock thermostat housing, cleaning and replacing with the GBS part (much more sturdy!). Based on my previous experience with coolant systems a small smear of gasket seal was in order too...
I've also fitted the dipstick - straight forward. Next it was time to fit the radiator and fan, really simple and a 10 minute job although a quick read of other blogs helped (tabs need to be bend backwards so the radiator sits on the inside of the mount otherwise nose cone will not fit):
Looking good! Onto plumbing her in....again, another simple job that requires a methodical approach:
You will notice the mounting bracket that connects to the steering column mounts, the tube is pretty solid in place but I guess after a while and with a lot of heat cycles the hoses will get softer and maybe sag. Its a GBS part and easy to fit, the pipe itself is attached to the bracket via cable tie.
Subscribe to:
Posts (Atom)