Back in the house I spent a lot of time measuring the layout for the dash whilst watching Car SOS - living the dream!

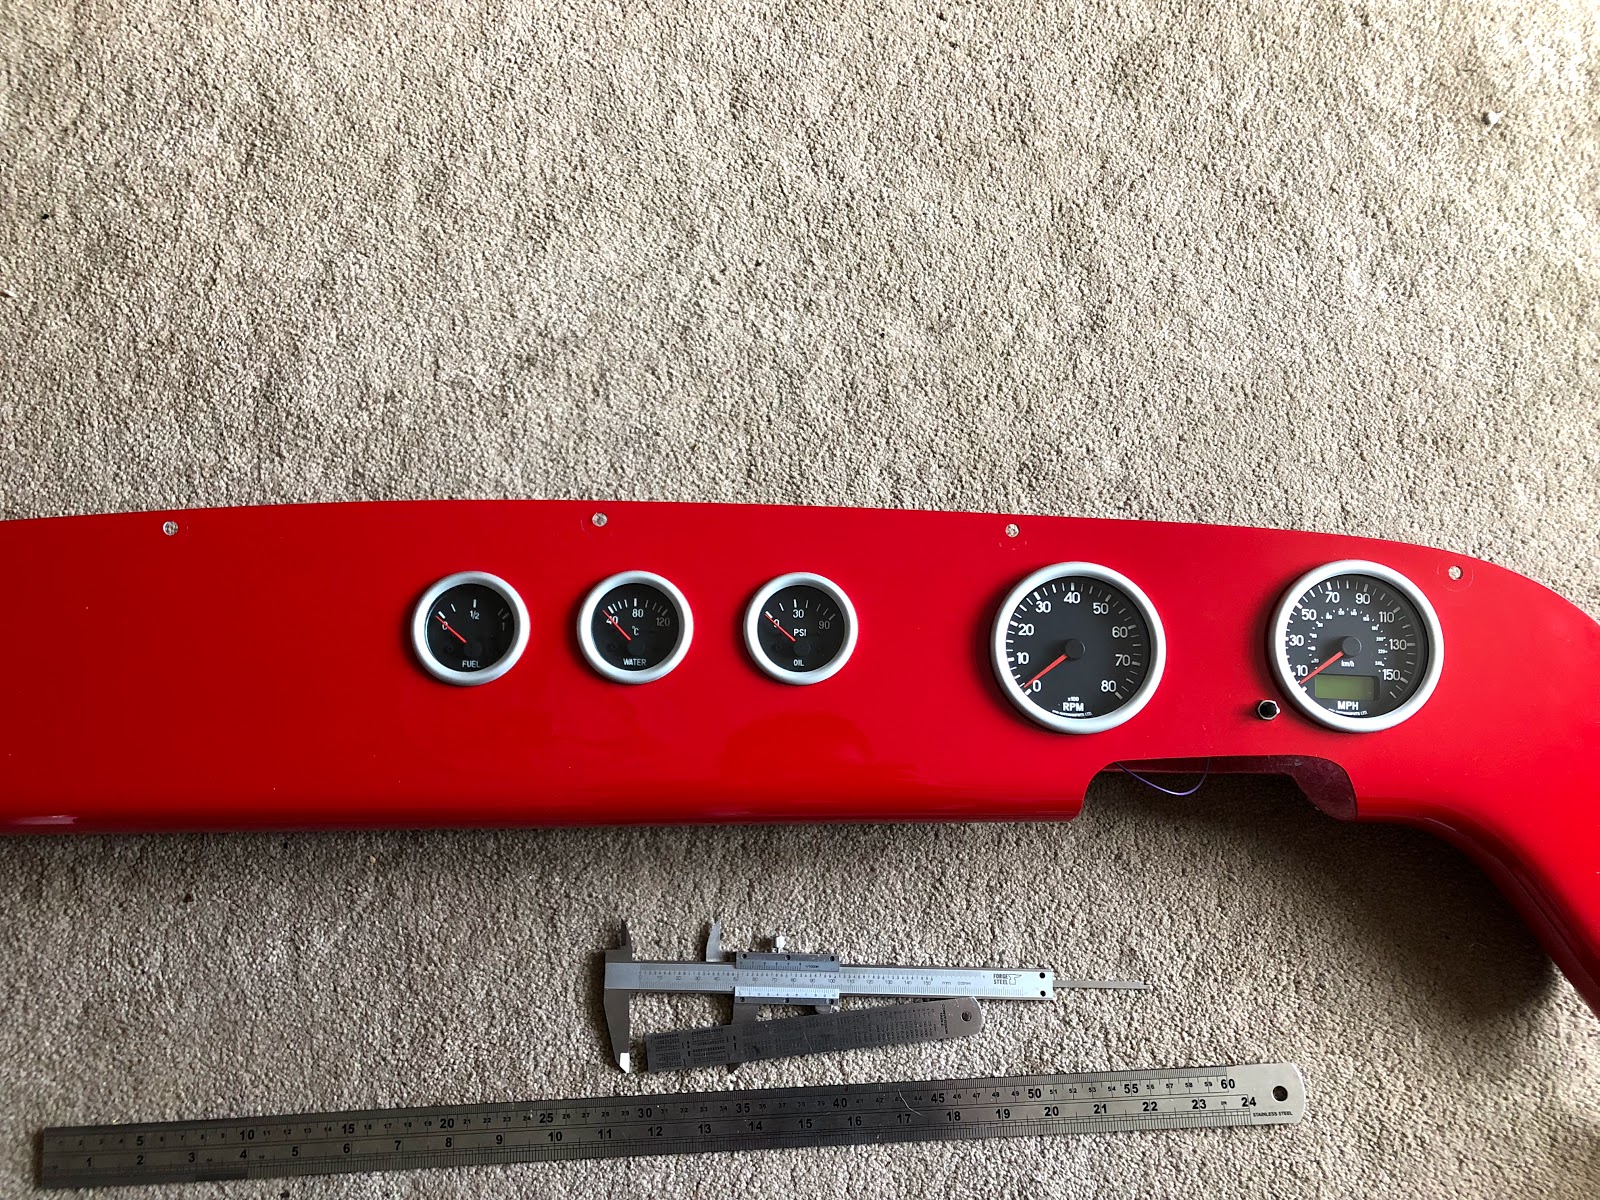
I went with ETB gauges which seem really good quality, the only problem was they dont come with any kind of template so it was either find a compass (and trust I get the circle right) or scout round the house finding some 80mm and 52mm circles. I went for the latter :) The tacco and speedo were done with a cup found in the kitchen.....the others took some hunting. Finally I found what I was looking for:

Ready for cutting:

Note how each of the left hand dials drifted slightly off the line - they are actually equidistant. Next few pictures show the process, drill using undersized cutter and then finish with the dremmel at low speed with sanding attachment:


Onto the wiring. The documentation with the clocks is brilliant so it was easy to work out which wire goes where, coupled with the info I had gleamed from the forums for the dash fly-lead and my trusty multi-meter everything was a breeze.
Even though all this will be hidden I am positive its an IVA requirement to have the wires neatly tucked away plus its asking for problems just shoving them behind the dash, so I decided to cut a hole out the rear of the dash and fit a grommet:

Added a little braid and heat shrink:

There is method in the madness....

Almost finished:

The remaining wires are for the warning lights. I am assuming the lights will need earthing and I'll probably spur them off one of the clocks, once the warning lights are in I can fit the dash for real.
I've been doing a lot of electrical testing on the car whilst I wait for the ECU and so far so good - as a result I couldn't resist seeing if all is OK with the dash! The oil pressure sender isn't connected and I need to swap out the smiths fuel sender, everything else looks good and I have power and lights.
No comments:
Post a Comment