Saturday, 8 June 2019

Hood Cover

Ordered a Hood Cover from soft bits for sevens (https://www.softbitsshop.co.uk) after reading some good reviews.

They delivered within two weeks which is not bad considering it was made to measure.  The quality is awesome, really really good and it fits perfectly.  You can tell these guys are proud of their work.

Fitting was easy.  I made a jig for drilling the windscreen frame as I didn't fancy taking it apart again, it took me about an hour to make the jig and test it on a scrap piece of frame and it worked a treat.

Not much else to say other than a couple of pictures.  Some adjustment of my rivet gun, its too fat to fit in the supplied poppers, a few minutes spent with the vice and a file:


Next job was to carefully attach my jig to the frame:


And away we go:


After lots of measuring and tweeking the finished product:


I have some material for the boot cover which I ordered from eBay, my mam is going to help me fit that and she is going to do the sewing for me.

Its a little too dreary outside for its first test but I will try get her out later on today.


Sunday, 26 May 2019

Post IVA Tweeking

Nothing of any real interest but this is a list of things I think I will be looking at over the coming weeks.  I am still waiting for registration document so may well be able to get some of these in before my V5 arrives.

IVA Recommendations 

The IVA man picked up on a couple of issues that were not a fail but he recommended looking at, in no particular order:
  1. Drivers side front brake hose - slight chafing on full lock.  He stuck some temporary padding to get me home, however, I suspect the hose simply needs moving round slightly.  The passenger side is fine and the drivers side failed first time as it was kinked.  I suspect I was simply too enthusiastic when unkinking, should be easy to sort.
  2. Brake master cylinder washers - there are no washers behind the bolts attaching the master cylinder to chassis, easy fix and what he says makes sense. << done

  3. Spacers on brake pipes offside gearbox area - hmmmm, this one will be an absolute bugger to get to!  I need to think about this and he did suggest some simple padding between the brake pipes will be fine.
  4. Additional infill between passenger lower and upper dash - there is a small space between my lower and upper dash.  No biggie but a suggestion was to try and fill this gap in.  I'm going to leave this one to be honest unless I decide to take the dash out at some point in the future.
  5. Additional fixings for throttle cable - the cable passes above the driver side wishbone, it needs some sticky pad cable tie holders (which I already have) attaching to it.  Quick fix and stops any premature wear and tear. << done
The interesting and fun list

This is a more interesting list and my thoughts over the last few days, again in no particular order:

  1. Wind deflectors - it gets windy driving the car, I am not really that bothered but if I am going to get the wife out I think I'll need to make it a little more comfortable.  Reading on a few other blogs it seems like wind deflectors make a significant difference and they sound like an interesting piece of work.
  2. Engine Cooling - examiner commented the engine seemed a little hot.  I am not sure if its his experience or actually an issue, certainly from what I read the Zetec runs hot.  None the less I am going to consider some bonnet vents\louvres.  Louvres seem more of a DIY thing I can tackle at home but will need some careful research to make sure I get the right look and effect.

    Another suggestion he had in this area was a double size radiator and I see GBS sell an ATR one, there are reviews stating a significant decrease in temperature but they aren't cheap.  I will only investigate this further if cooling becomes a problem.
  3. Steering Wheel - I must replace the god awful sierra wheel!  Its massive and makes getting in and out difficult and after a while your legs ache.  I have already purchased the wheel and have a boss, I need the adapter kit for the two though.  Now the question is, do I go quick release?  I think I will. << done
  4. Immobilizer - a few people have mentioned this to me and I had disregarded it till now.  My thoughts were well if someone wants to steal it they will stick it on a low loader, however, an immobilizer is cheap to buy and will be interesting to fit.  CBS do a Thatcham 2 for £60 and it comes with a nice visual deterrent near the lock barrel in the form of a flashing red light.  It will be difficult for someone to bypass but possible, with significant effort.  I figure though if I go with quick release steering wheel + immobilizer it will put most people off.  << done
  5. Map switch - something I may delay until I speak to emerald.  I need to book a RR session once on the road, I do like the idea of a map selection switch from Eco and Power.
  6. Front indicator extensions - I will be removing the awful extensions, they look stupid.  << done
  7. Geometry setup - I am thinking of asking GBS to do this for me; the are the pros.
  8. Wet weather gear - GBS do a kit but its pricey, at over £600 it includes the doors and to be honest I am not interested in them.  All I want is something to keep me dry should I get caught out, I don't mind getting a little wet.  Soft Bits For Sevens do a kit which is really tidy and will make putting up a cover a doddle, its also half the price.  I will definitely be getting in touch with them. << done
  9. Fuel Sender - this one is to be decided once I do some driving.  The gauge and sender are matched but the float isn't right, I have fiddled about and managed to get a more accurate reading.  If it still doesn't work correctly (it wasn't registering above half full) then I will look at some alternatives from CBS, namely a pole fuel sender.  They look more reliable and sensible to me - but I need to match the resistance to gauge. << done (seems good enough and registers empty to full)
  10. Speedo sender bracket - I know the pulses are right as it passed, however it was a right faff on to get working reliable at the test.  In the end the examiner and I ended up taking some tin snips to the bracket and forcing it to the right angle.  It worked, however, it looks a mess - now is that a problem?  I don't know but I certainly need to at least investigate.  My thoughts are to reverse the rivnuts round so I can easily remove the bracket - at the moment it is pretty impossible to get a spanner in.
  11. Cold air feed - now this isn't mentioned much so I will need to do more research.  I can't help but think there is a whole load of heat soak going on, maybe it is only a potential problem when stuck in traffic as I can assume there is a lot of air flow when the car is moving.  I can see the logic of a ram air feed (plus it looks nice from the front) and something like a pipercross viper cone filter. 

    The viper is fully enclosed to help with heat soak and if I can supply it with a fresh air feed - perfect, its almost straight line from the nose cone.   When driving to the test centre I got stuck in a lot of traffic and the car seemed to hunt a little at low speed, could be the map but I did think it will be sucking in some very hot air!
  12. High pressure fuel pump mount - I noticed the fuel pump is only mounted via one of the exhaust clamps, it is just touching the bottom one.  It will probably be fine however it will not take long to move it down slightly and ensure it is fixed to both.


Monday, 13 May 2019

IVA Attempt 2 - It's a Pass!

Well, chuffed is an understatement.  First the prep work, far too much to list but in brief:


  • Indicators were too short - had to extend them out a little
  • Brakes under steering column were rubbing - easy enough to sort
  • Lots of fiddly bits of trim that were an absolute nightmare to get to
  • Steering column running on brake pedal - move to the left 2mm and my god what a chore that was
  • Steering column bottom UJ bolt too small - my bad
  • Fog light not turning off when lights are switch off\back on - CBS to the rescue, black box fitted with relative ease

The drive there was awesome as I am much more confident now.  The drive back however was unreal, I have actually built a car that works and is road legal, wahey!!!! Onto registration but for now some pics:


Tuesday, 7 May 2019

IVA Prep - Dashboard

Plenty going on at the moment and I am ticking a few of the IVA fail points off.  One that I was kind of aware of and that I thought would be OK was the ECU position.  As I have a matrix fitted it isn't in the usual mount point well back in the scuttle.  The IVA man picked up on the radius as well as a couple of bolts missing protective caps.

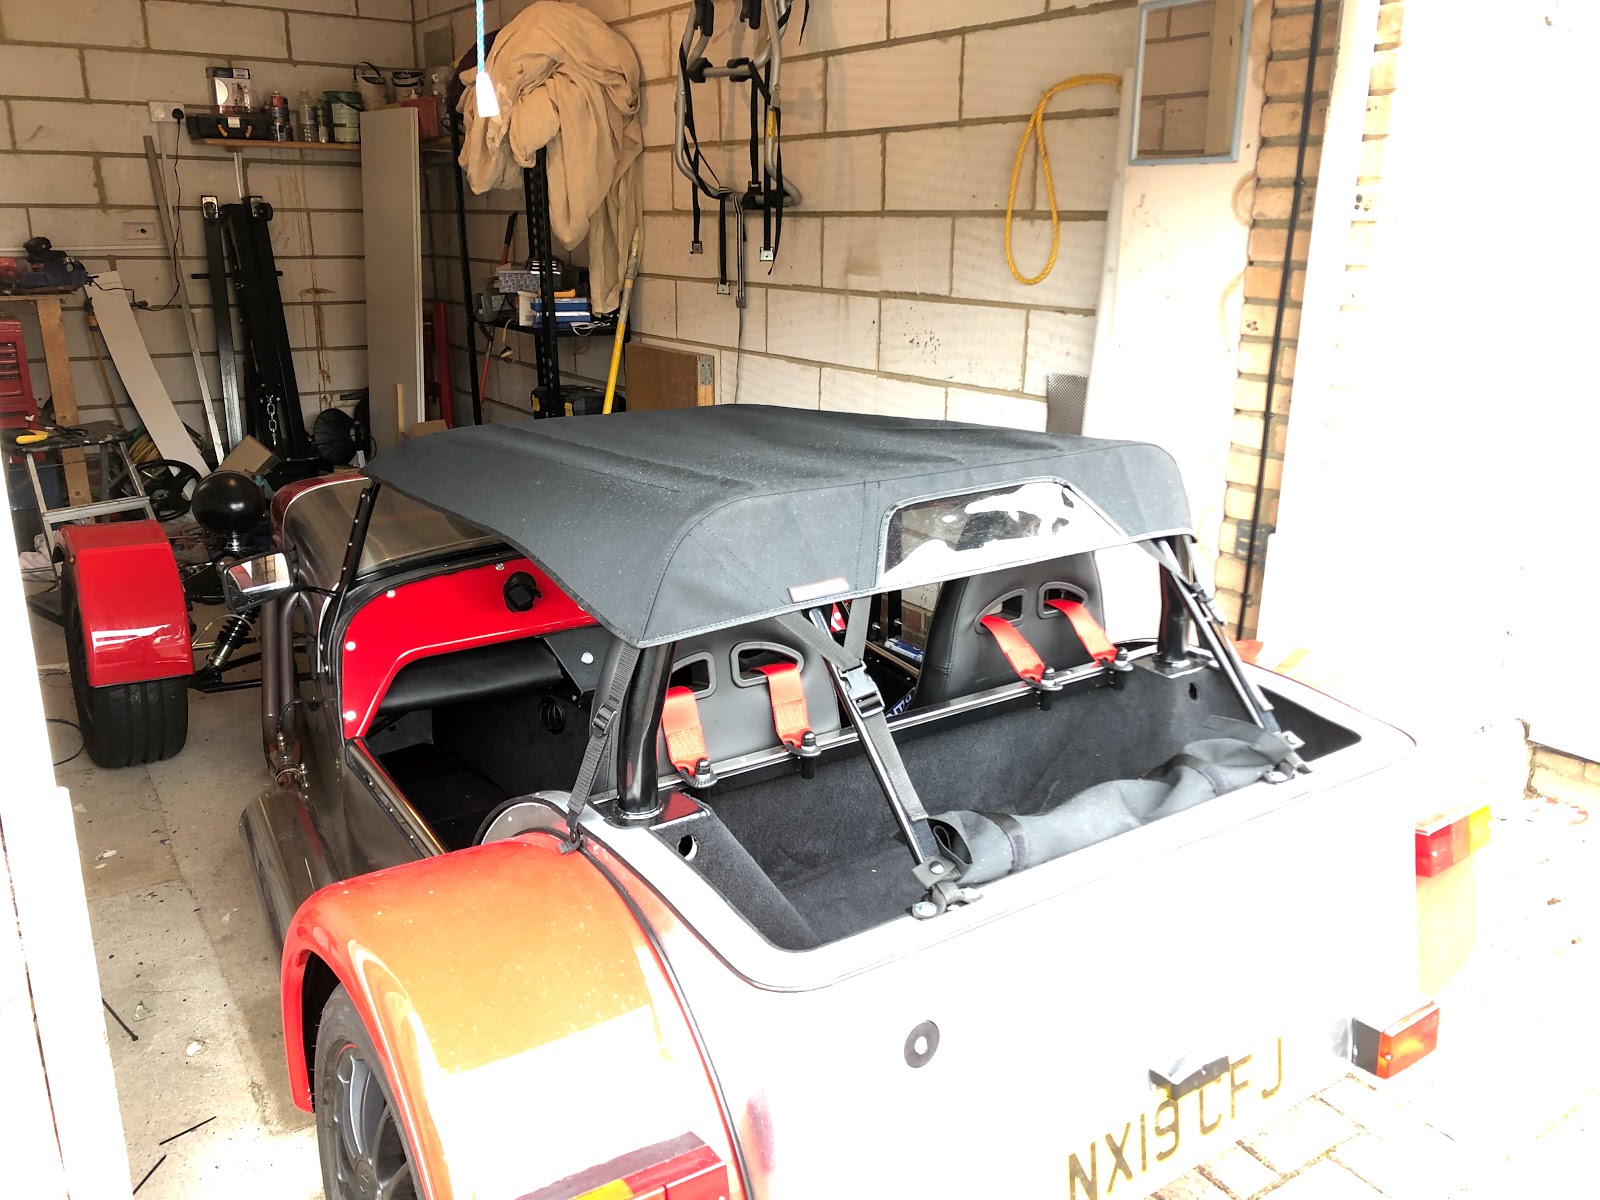
If you look in the top left you can see how it was:


Thinking about it if the rain hits in the wrong direction its not going to be well protected!  Now, I thought I would try making something out of aluminium - doable but will require a lot of fettling.  

Second thoughts was to maybe find some mouldable plastic - not easy to find and probably not going to work.

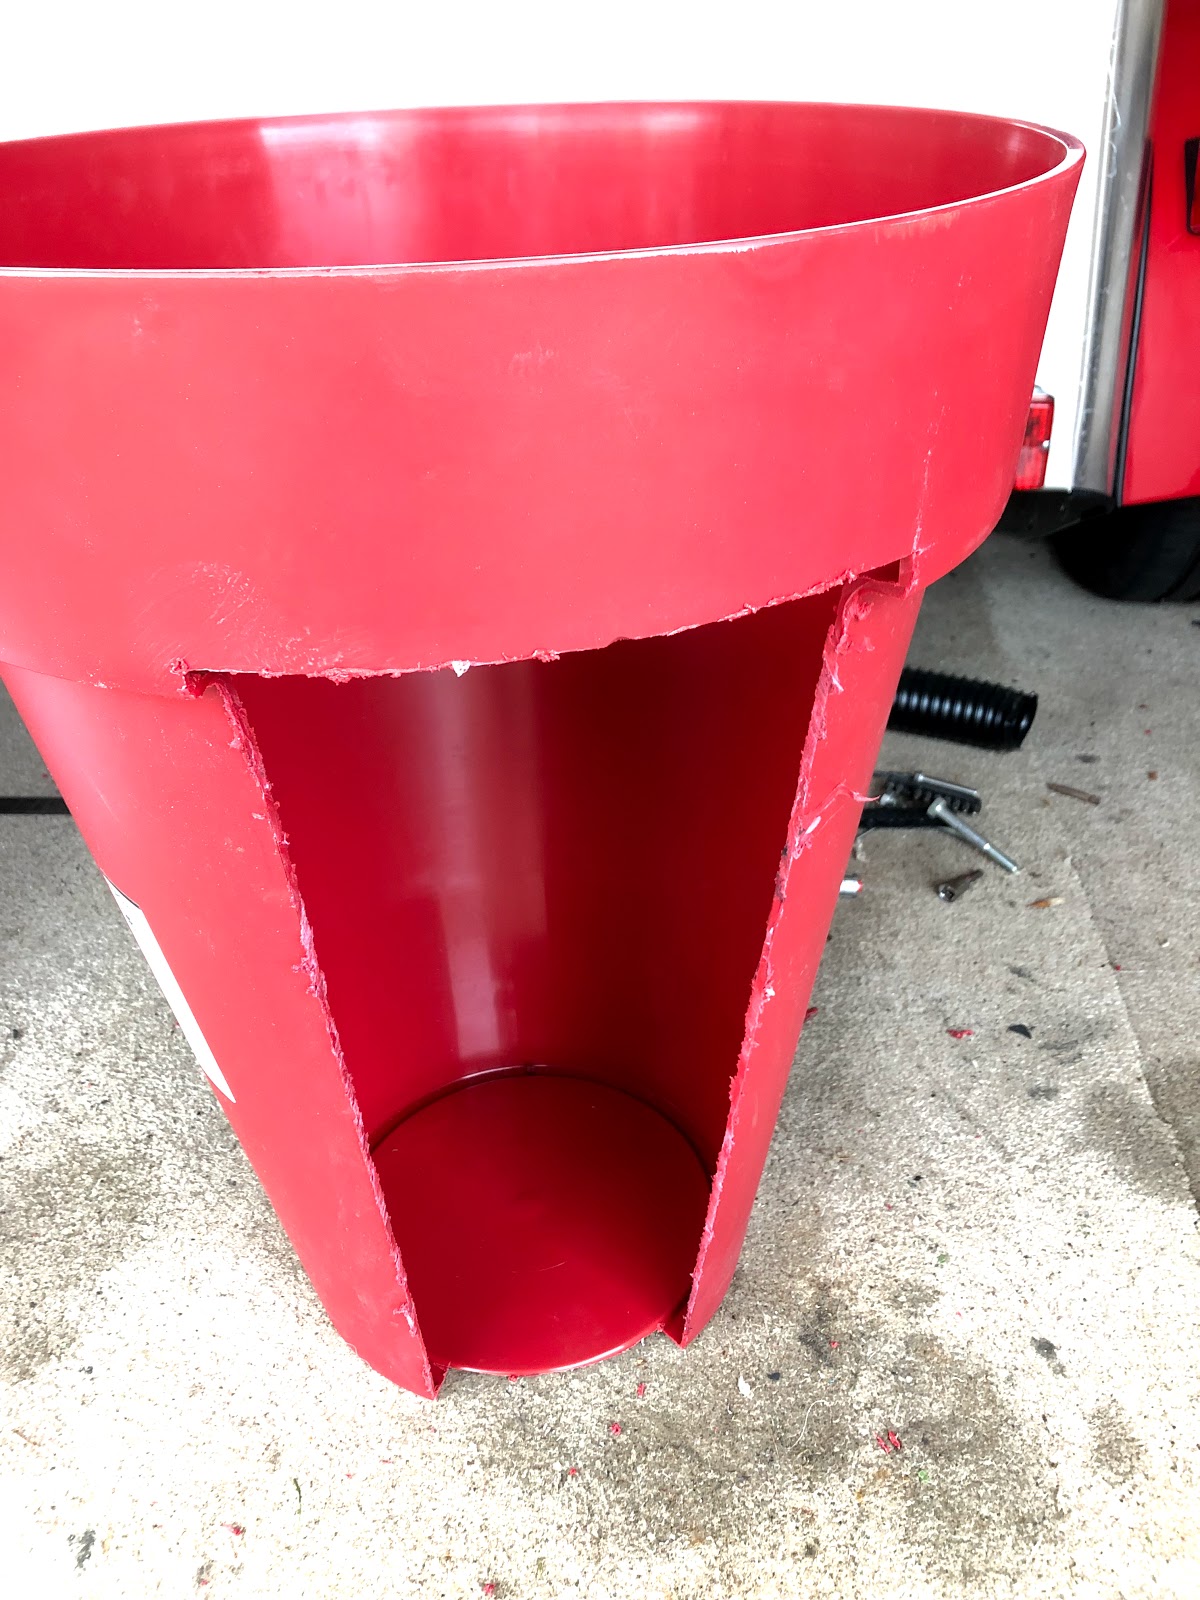
After wandering around B&Q for a while looking for a suitable candidate (I was thinking kitchen bin or some kind of round storage box) I came up with this - a plastic plantpot:


It may look funny but its made of strong material that looked easy to work with and it has the perfect radius.  Plus I figure if it didn't work first time then there's enough material in it to have a couple of goes.  First step is to cut out a rough template:


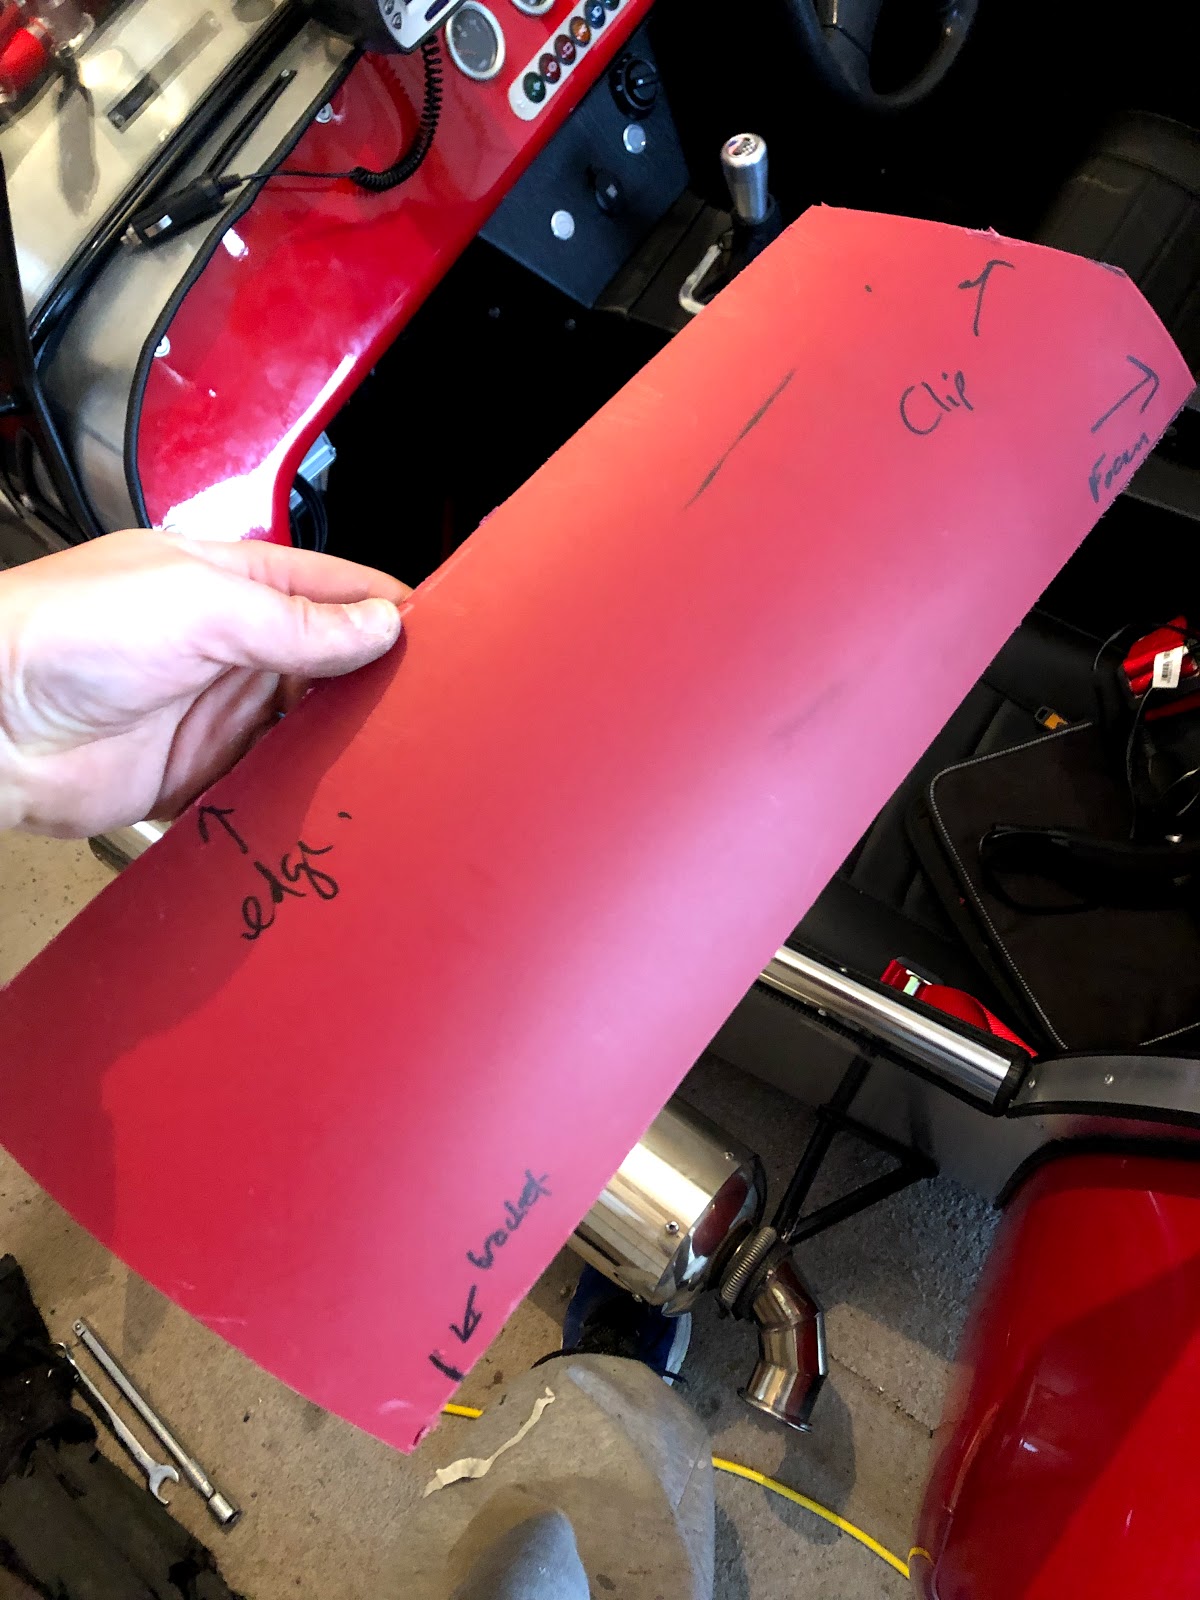
Then it was slow progress trimming it down to fit gradually:


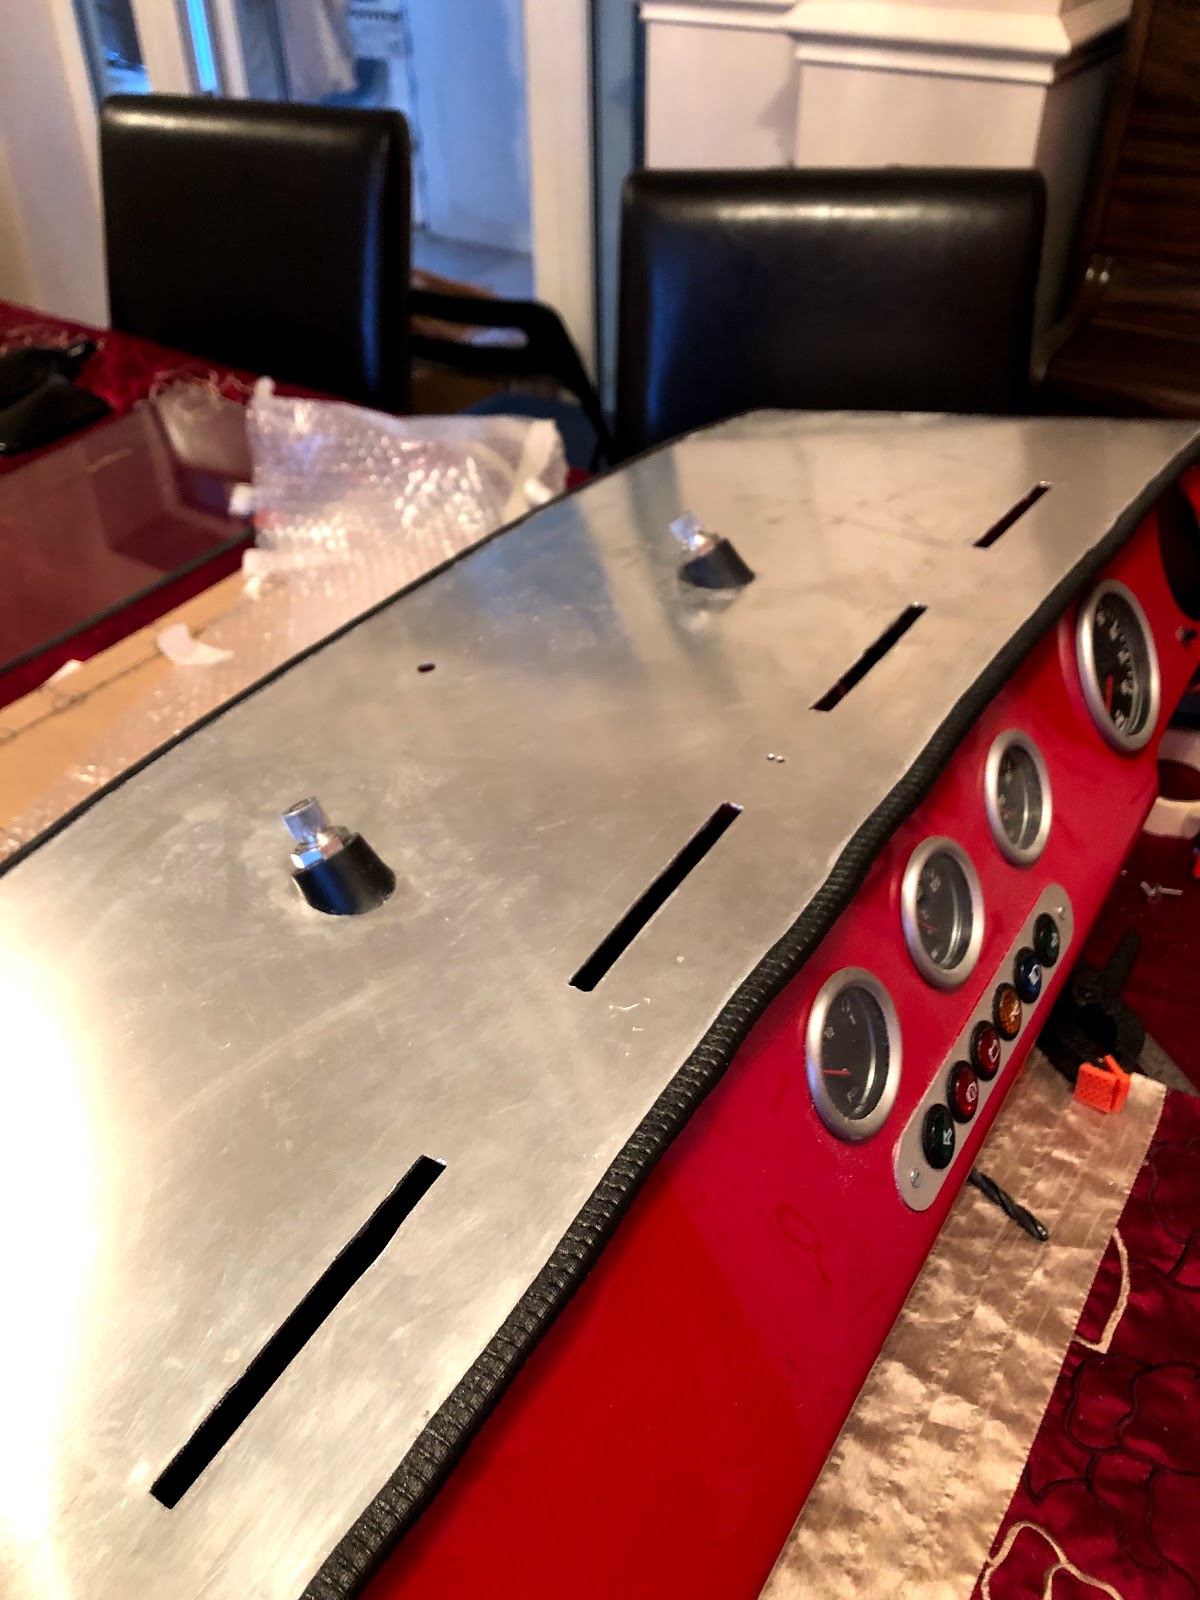
I needed some strength for along the bottom.  Not too fussed about the top but the bottom has the potential of getting a good knock plus its going to rest on the chassis to the left and connect to the AUX panel in the centre.  I opted for a piece of wood which I wrapped with aluminium;  I wanted something I could easily screw into:


The IVA man warned me that whatever I did I needed to consider the bottom radius so I kept the same as the existing dash, I know that is compliant.  Some creative blue peter style craftsmanship gave me the result I was after - plenty of rubber hosing and some carefully placed screws:


I then wrapped it with some offcut carpet to keep the curves nice and smooth, looking good:


Wrap the whole thing up in the leatherette used for the existing AUX panel and centre console to match and fit:


Neat and tidy and it should tick box for the IVA man.  It looks really good, much better and as well as being safer for the passenger it provides some protection for the ECU from the rain.

Result!

Monday, 6 May 2019

Stuart the Mouse!

So I was busy working on the car and I noticed little bits of bird seed in strange places....odd, maybe I spilled some early on in the build?  Alas after taking the AUX panel apart to get to the fusebox - there was some more!  Definitely something going on and after spotting the leftovers of some wiring and trim I realized I had a friend....


Its my own fault really for not keeping the garage tidy, spilling bird food on the floor and leaving the garage door open.  Two little guys decided to move in and make the garage their home.

I felt a little bad removing their nest but it had to be done I couldn't risk any more damage to the car.  Everything out and the mouse hunt was on!  There was no sign of them but before I put everything back in I decided to check against some slate tiles we have leaning against the wall, bam!  Two little critters jumped out and scurried into the abyss of stuff all over the garage floor.


My wife and I spent a good 30 mins trying to catch the pair but they gave us the slip.  On the way out of the garage one of them stopped under the car, he thought better of it and scuttled onto the front lawn and he was away.

Trip to B&Q to invest in a strip for the bottom of the garage door and also cleaned everything out so there is nothing in there to tempt them back:


Hopefully that is the last of them and I can concentrate back on the remedial work.  In six days time I will be at the test center with my tick list complete.

Luckily in this instance no real damage had been done but it was a close call....

Thursday, 2 May 2019

IVA Attempt 1

Well, its a fail...but that was expected and I am really pleased :)  After much scrambling about and last minute windscreen wiper "fiddling" she was ready, albeit filthy:


With my wife driving the "support car" full of tools we set off late evening, weather held up and luckily we were not rained on.  The drive to the hotel was enjoyable but I was very nervous after all I had put this chunk of metal together that was moving 60mph down the road.

Put her to rest overnight in a cover just in case it rained:


Early start in the morning straight to the test center in rush hour traffic I had developed a fault.  I couldn't get the car into gear whilst warm and right outside the test center I had to turn it off, put it in gear and drive in - good first impression!

The car failed on a large number of items all of which were minor, some missing trim, my speedo wasnt working properly, cables needing tidying up slightly.  The major items I passed on, all of my windscreen, wipers and washers all were fine.  Emissions and noise test were fine (although it took an age to get a pass and we ended up spilling coolant out of the header tank everywhere).

Waiting on my final list and to book the retest but I am very, very pleased!  IVA Attempt 2 coming up....

Tuesday, 23 April 2019

IVA Booked - Almost Done

I haven't blogged in a while as I have been busy working on the car without the need for many pictures.

Unfortunately I had an oil leak from the sump, turns out I had used the wrong (stock) gasket and needed a specific one for my lowered sump.  In addition I snapped the clutch cable which in turn knocked the release bearing out of the fork arm.

It meant the engine and gearbox had to come out - bit the bullet and cracked on, albeit with a grumpy sulk and plenty of chuntering whilst I got the engine hoist out:


Both seats are now in and the IVA is booked for 2nd of May - lots and lots of tinkering written down.

Wipers and both seats fitted, pretty straight forward:


Thursday, 31 January 2019

Heater Vents

Post slightly out of order but a quick update on the vents, they were simple to do just required lots of measuring.  Unfortunately - I cocked up one of the measurements, god knows how I managed it because I checked so many times!  I simply didn't concentrate and ended up putting a drill hole right in the center of the scuttle.

After a littler thinking I decided to put a nice button head bolt in - absolutely no function at all but it hides the mistake well.  Some pics:


I can see the mistake above - I've filled in right the way along to the center line and then drilled the corners, at least I spotted it in time before dremeling out the blank!  That would have been harder to fix.

The slots cut out and the offending hole:


The plastic "plenum" is then glued in place on the rear and left overnight to go off.


Finished result on the car:


Controls wired in and tested, looking nice and neat:


Windscreen Final Fit

Gulp - this was it, onto the real thing and time to start fitting the glass.   Actually it was relatively easy, following on from previous blogs the glass goes in fine with a little washing up liquid and persuasion.  I don't have many pics but I hit a couple of snags, I damaged the paint work with the ratchet straps but more frustratingly I didn't account for the extra length required for the rubber.

After an hour of measuring, filing and fettling I managed to get some offcuts in place ready for filling:


I also decided to grind down the screwheads each side; even though I countersunk each it would look naff not being painted and I wouldn't get a flat finish without at least taking a bit off.  Why not go the whole hog and grind them completely?  Yes, I will need to take the frame off should the glass crack - but I will likely have to do that anyway so preferred to go with looks rather than "what ifs":


Some decent body filler, sanding, patience and a few more coats of paint later I managed to get it fitted.  Again, not many pictures but here is the finished result:


And my heater vents ready to go :)

Tuesday, 29 January 2019

Windscreen Part 3

The windscreen marathon continues... :).  After achieving a really good finish on the windscreen mount I decided I wanted to spray the frame as well.  The finish on the aluminium isn't great and I quite like the idea of having an all black surround.

Not too many pictures for the actual spraying but it is important to apply a decent, suitable undercoat.  I have previously read about etch priming aluminium so thought it prudent to research what base coat should be applied.  I chose the correct and recommended hammerite undercoat for aluminium, it went on fine:


Its fairly cold outside at the moment and the recommended minimum temperature is 5 deg, borderline achievable.  To aid the process I kept the frame warm in the house whilst warming the garage up using a heater.  Its a fine balance between warmth and obviously fumes; even with a mask I didn't want to spent too much time in the garage whilst spraying even with the doors open.

I knew it was going to take a long time for each coat to dry so I knocked up a couple of stands out of some offcut tile edging I had laying around.  Worked well and it meant I could transfer the piece into the dining room whilst drying:


I am surprised I managed to get away with the smell in the house whilst it was drying, luckily my wife was out at work otherwise I don't think she would have been so forgiving :)

Windscreen Part 2

Following on from the previous post it was time to start drilling the holes for the windscreen frame.  The factory had advised me to use self tappers cut down to 4mm, I decided a slightly different route.  It is important to keep the length of the fixing short enough so it doesn't touch the glass; yet long enough to have enough material to secure the screen.

I eventually wend with dome head M5 bolts, mainly because I am going to use dome heads to attach the mounts to the scuttle and also I like the look of them.   I also don't like self tappers as I find they can be difficult to remove later.

First step was to drill out the pilot holes - easy enough to do:


I simply measured the width of the frame and drilled down the center four holes evenly spaced.  Next I had to fix the windscreen and tap the holes:


When both sides were completed I started the paint prep work and began several coats of hamerrite spray paint - it gives a good, long lasting finish:

After several days drying in the heat I fitted the trim - this is a requirement for the IVA.  I actually like the look of it as well:


Really chuffed with the finish I managed to achieve.  Next update will be the windscreen frame and fitment.